How to add a signature in Gmail
Create an email signature in the and save it.

On the , hover the mouse cursor over the created signature and click on button Install.

Select Gmail from the list of email clients.

Copy the signature to the clipboard by clicking on button Copy Signature.

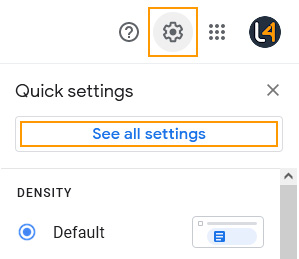
Sign in to your Gmail account. At the top right, click on button Settings and then click on button See all settings.
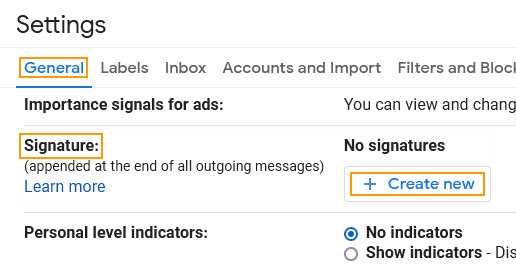
In the General tab, scroll down to the Signature section and click on button Create New.
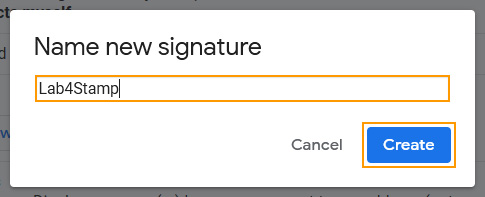
Add the signature name and click on button Create.
Paste a the signature into the signature box by pressing the Ctrl+V or Command+V keyboard combinations.

If you want the signature to be automatically added to all new emails or replies, select the created signature in the FOR NEW EMAILS USE and ON REPLY / FORWARD USE lists.
Additionally, you can tick the checkbox below to have the signature inserted before the quoted text.

Scroll to the bottom of the page and click on button Save Changes.

When creating a new email, if the default signature was not specified, click on button Insert signature and select the signature from the list.
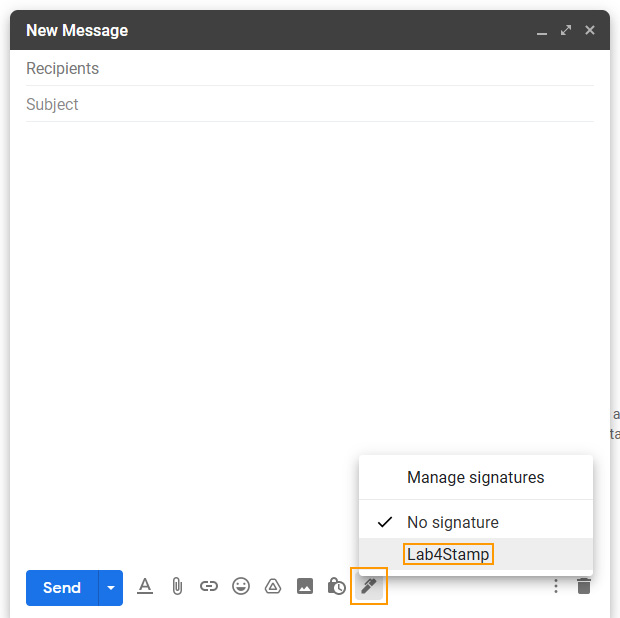
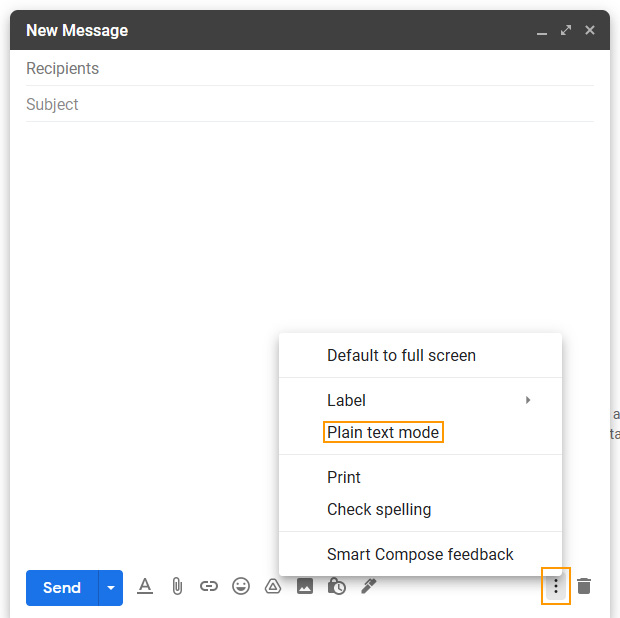
If the signature is displayed without formatting and there are no images, turn off the Plain text mode. To do this, click on button More options and uncheck option Plain text mode. Additionally, you can reload the signature by selecting option No signature according to step 11, and then selecting your signature.
If you have any questions or comments about this guide, please contact us at: .

