How to add a signature in iPhone/iPad
Create an email signature in the and save it.

On the , hover the mouse cursor over the created signature and click on button Install.

Select iPhone/iPad from the list of email clients.

Send the signature to your iPhone/iPad by entering your email address and clicking on button Send.

Open the email on iPhone/iPad using the Mail app. Press and hold any part of the signature, and when the menu appears, tap on button Select All.
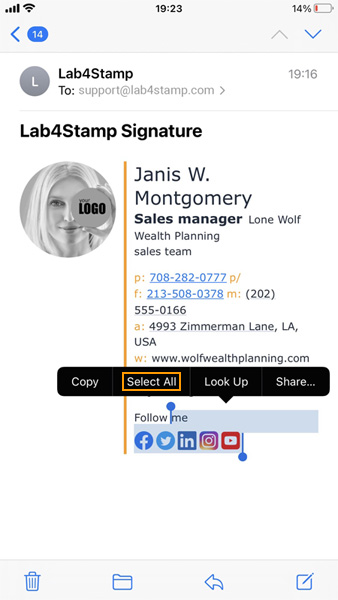
Copy the signature to the clipboard by tapping on button Copy.

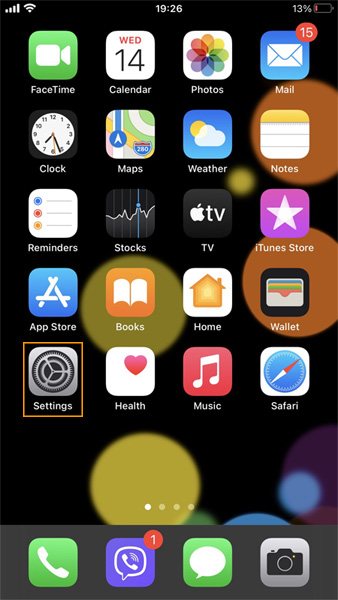
On iPhone/iPad, open Settings.
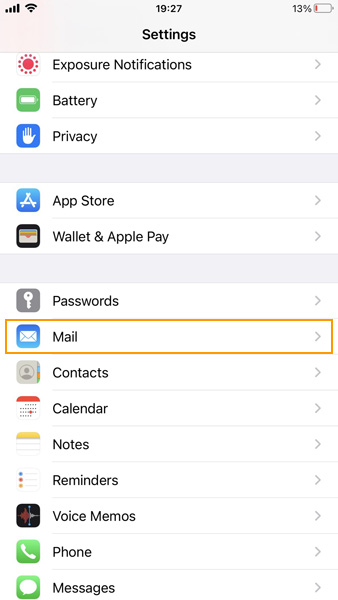
Choose option Mail from the Settings list.
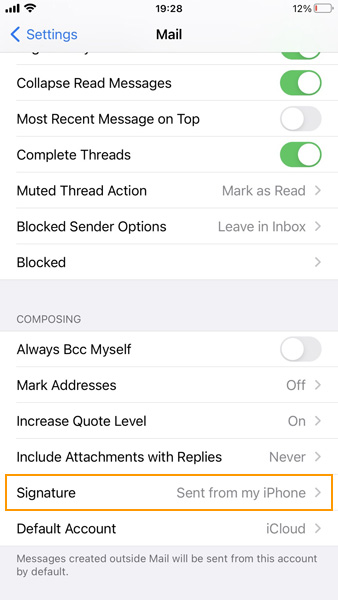
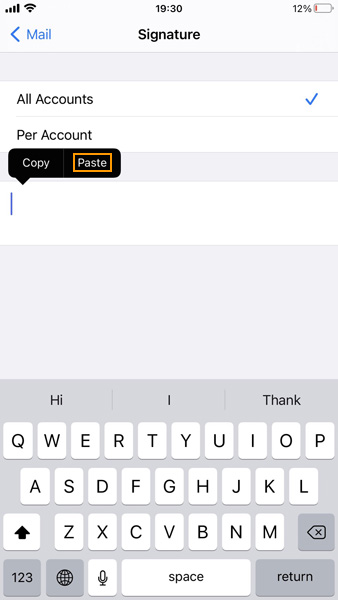
Tap on option Signature.
Remove the previous signature and paste a new one by tapping on button Paste.
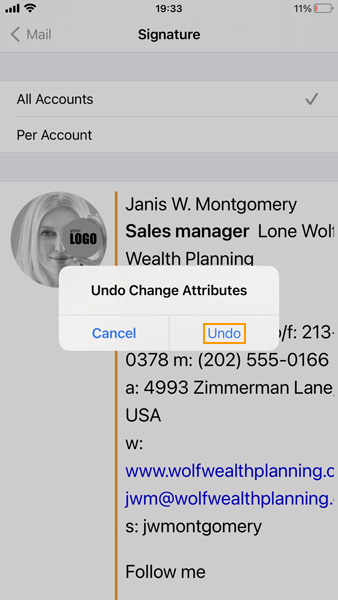
You may notice that the signature formatting has changed. This is because iPhone/iPad adds its own formatting. Find out how to fix this in the next step.
Shake the iPhone/iPad physically until the Undo Change Attributes window appears and tap on button Undo.
Create a new email and make sure the signature is added.
If you have any questions or comments about this guide, please contact us at: .