How to add a signature in Outlook
Create an email signature in the and save it.

On the , hover the mouse cursor over the created signature and click on button Install.

Select Outlook from the list of email clients.

Copy the signature to the clipboard by clicking on button Copy Signature.

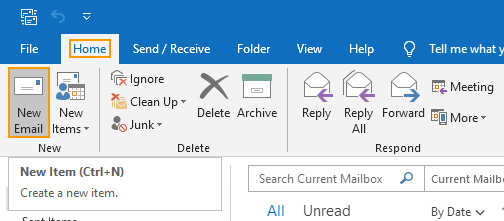
Open Outlook. In the Home tab open the window for creating a new email by clicking on button New Email or by pressing the Ctrl+N keyboard combination.
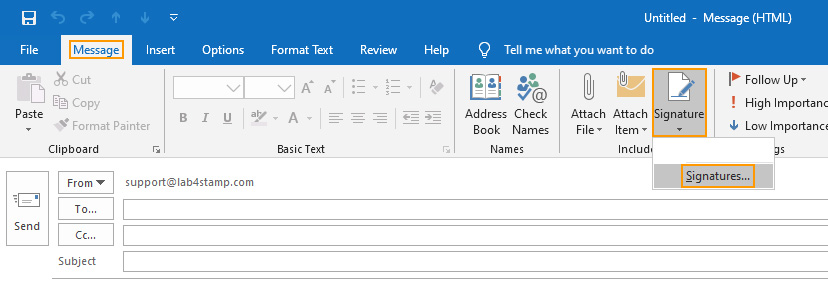
In the Message tab, click on button Signature and select option Signatures….
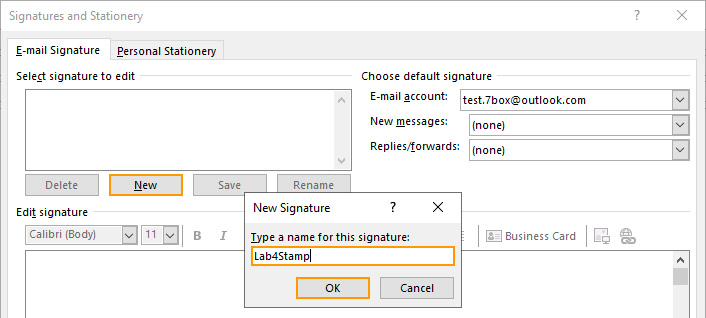
Create a new signature by clicking on button New and specifying the name for it.
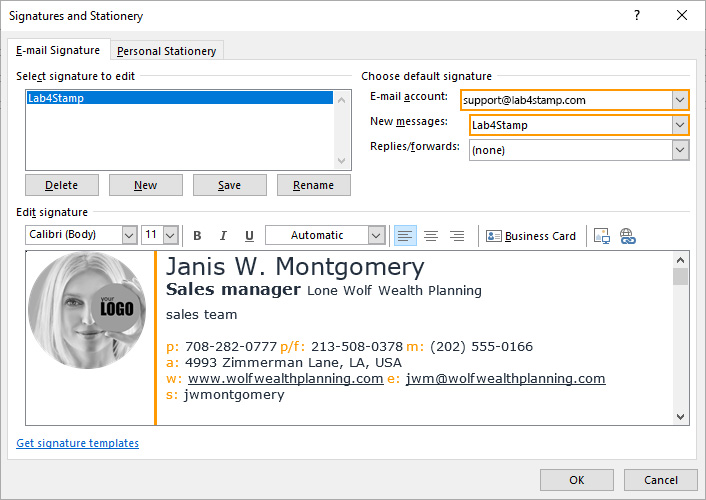
Paste the signature into the Edit signature box by right-clicking on the mouse and selecting Keep Source Formatting (K).

Specify the account in the E-mail account field.
If you want the signature to be automatically added to new emails, select the created signature in the New messages list.
Save the settings by clicking on button OK.

Create a new email and make sure the signature is added.
If you have any questions or comments about this guide, please contact us at: .